Skip to Main Content

Crafting in the Innovation Lab

A guide for our crafting equipment such as the Cricut workstation and Sewing/Embroidery workstation.

Learning the Cricut web-based Interface

Below you will find a step by step tutorial covering the basics of using the software for the Cricut machine.

If you would like to watch the video instead click here.

In the screenshot below you will see how the icon for "Cricut"  software looks like. Double-click it to begin.

After Cricut "Sign In" page has loaded, you will want to create an account. It is free and necessary in order to create a project. See next slide for account creation information.


An introductory step when signing in is to choose the machine you will be working with. There are 3 choices, the machine we have in the Innovation Lab is the "Cricut Explore Family".


After signing in, you will see the "Home" window. From here you can start a new project or choose to edit or print a previous project.


After choosing "New Project", the interface will load giving you 2 main toolbars and a template area.

On your left toolbar, the top button for "insert images" will give you some options to choose from for finding online images. Some of these images may have a cost associated with it.

The third button down "Insert Shapes" will give you options for common shapes and a "Score Line". Score Line is used to make impressions into the material to create folds cleanly if needed. When inserting shapes, remember that the shape can be altered at a basic level by clicking the "lock" icon at the lower left corner of any selected shape. In "unlock" mode the shape dimensions can change on the X and Y plane and then you can lock it again to keep those dimensions. For example, place square on the template, click unlock, and now you can elongate the square to make a rectangle, lock it again. It will now stay a rectangle.

Below you will see how a selected object has four options to manipulate it. Options are Lock, Scale, Rotate and Delete.


Helpful tools to organize your design


There is a third toolbar that helps in organizing your elements. This "Upper Toolbar" has Cut, Copy, Paste, Select all, Arrange and Align. The Align and Arrange buttons play an important role in the organization of the project's design. Let's look at an example of using the Align feature.

We can see the gathered circles are close to being in line but are a little off. If we wanted them to be horizontally linear we could choose "Align Top", "Align Bottom", or "Center".

We'll choose "Align Top" to align the three objects to the topmost portion of these elements.

You can see from the image below that they are aligned at the top and even though the spacing between these three objects seems similar they are not equal. You could apply "Distribute Horizontally" to make them equal distances apart if you wanted.


Setting up Project for Printing

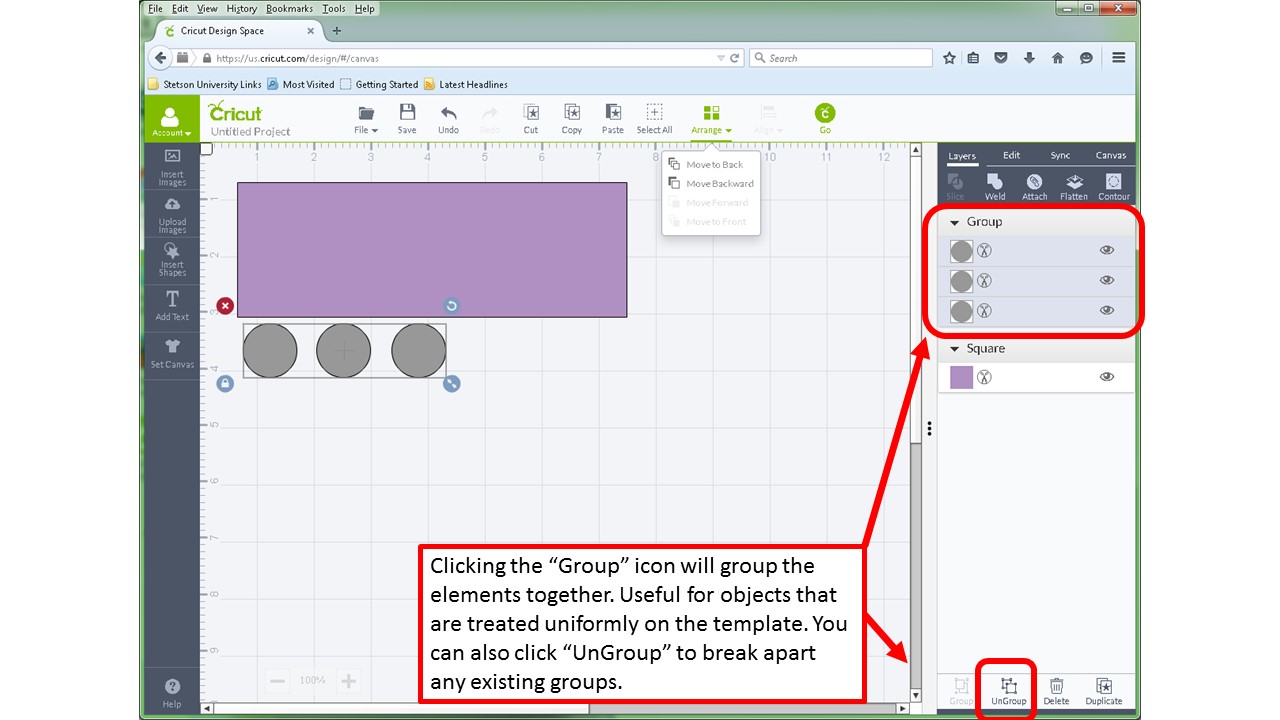
To organize your design even further you can use the Arrange icon in the Upper Toolbar to keep objects appearing as they should. As you add objects they establish a heirarchy in the list to the right. Every element you place is "above" the element you placed last. So if you make a rather large element after many smaller ones and they are overlapping, the large element will block the view of the smaller elements. So to organize these elements you can "Group" objects together and Arrange elements/groups. Below you can see that selecting all the circles will "highlight" the corresponding elements in the right list. Also, the "Group" icon at the bottom right is highlighted letting you know this selection has the ability to be grouped.

After clicking "Group" you can see the elements are grouped together and the containing field is called "Group". If you need to undo this grouping you can click "Ungroup" to separate the elements again.

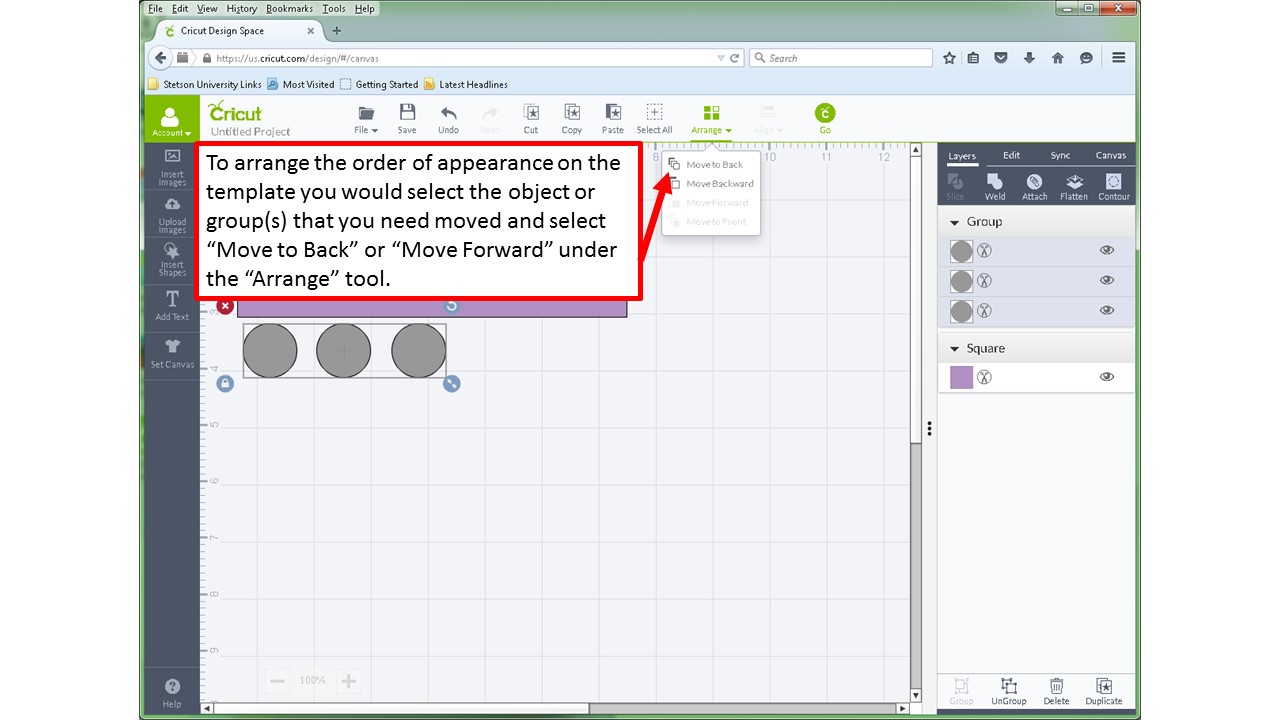
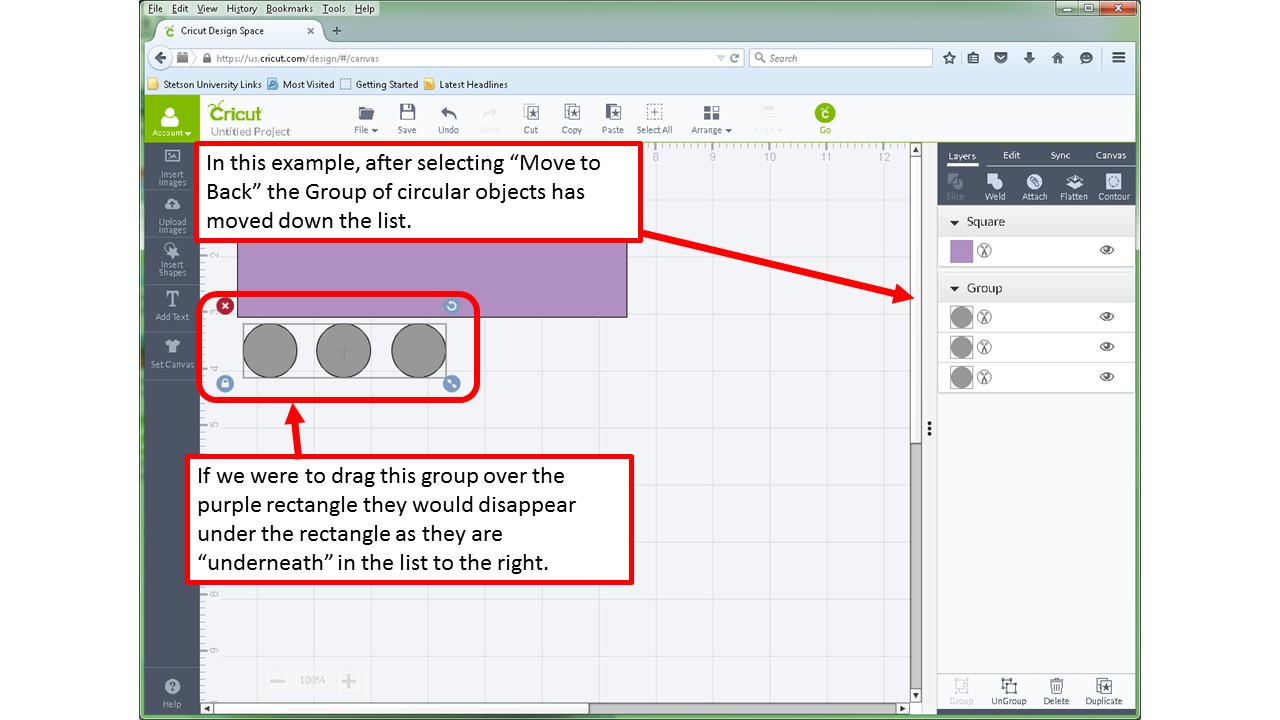
To change the heirarchy or order of appearance for the elements/groups then select the item(s) you want to move and then select "Arrange" and then the corresponding command. For the below image, selecting "Move To Back" will place the Group under the element "Square".


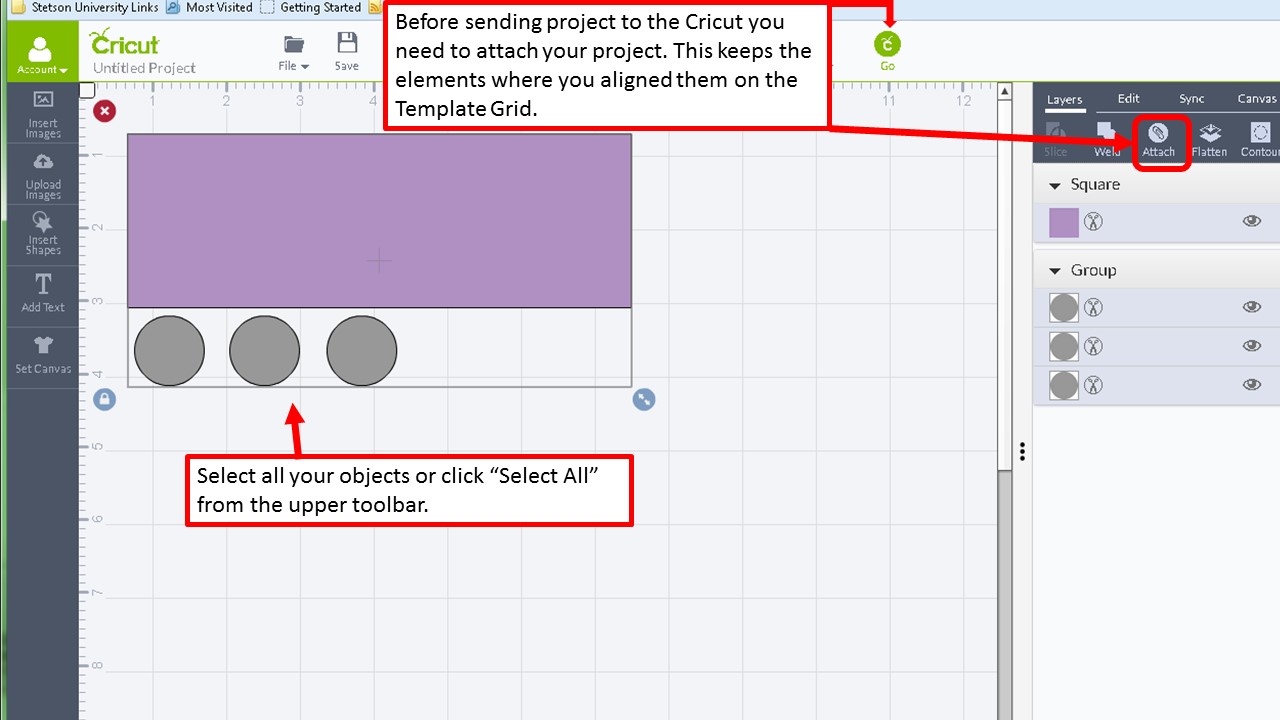
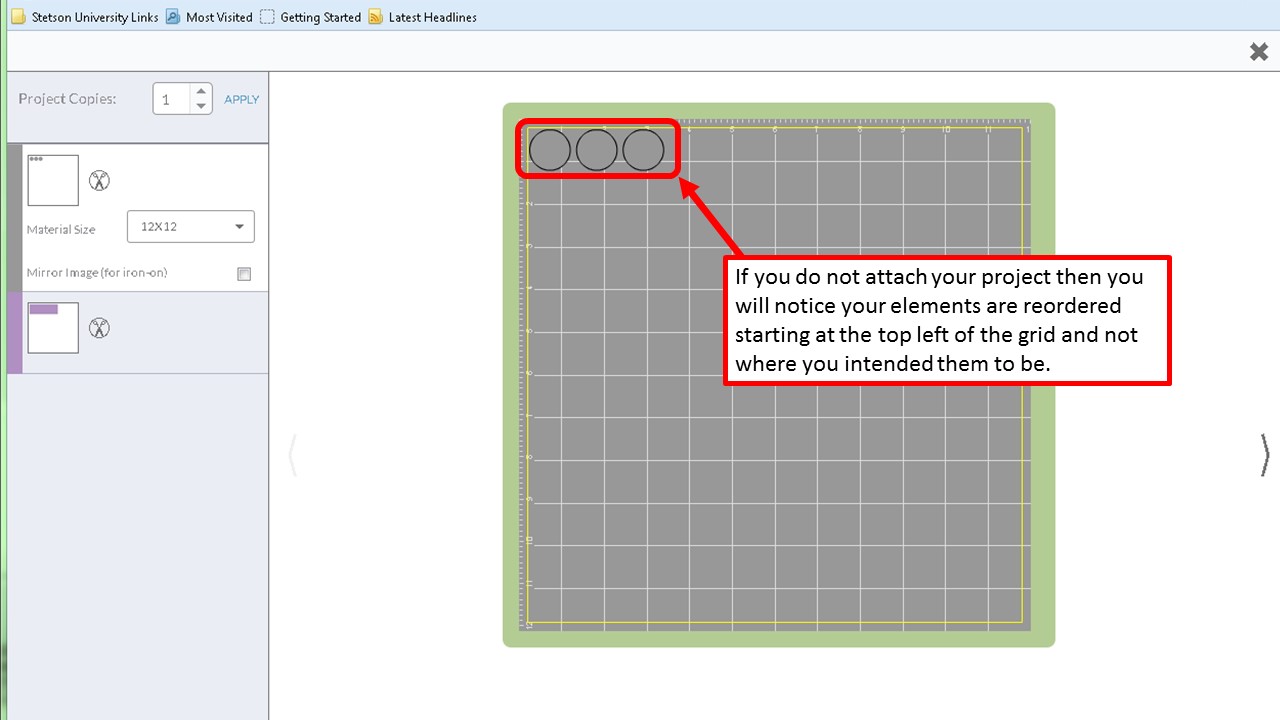
Now that we have gone over basics in the Cricut interface, let's go over the last step necessary before printing. The elements that are placed on the template need to be attached to the template to keep their placement for printing. If you do not attach you will see how these shapes are placed by the program before printing.

As you can see, if you do not attach the elements, then the program will treat your items as separate and try to conserve material by condensing the elements starting at the top left corner of the grid. In the picture you can see the left sidebar has the rectangle in a separate layer for another material. Each element treated separately.

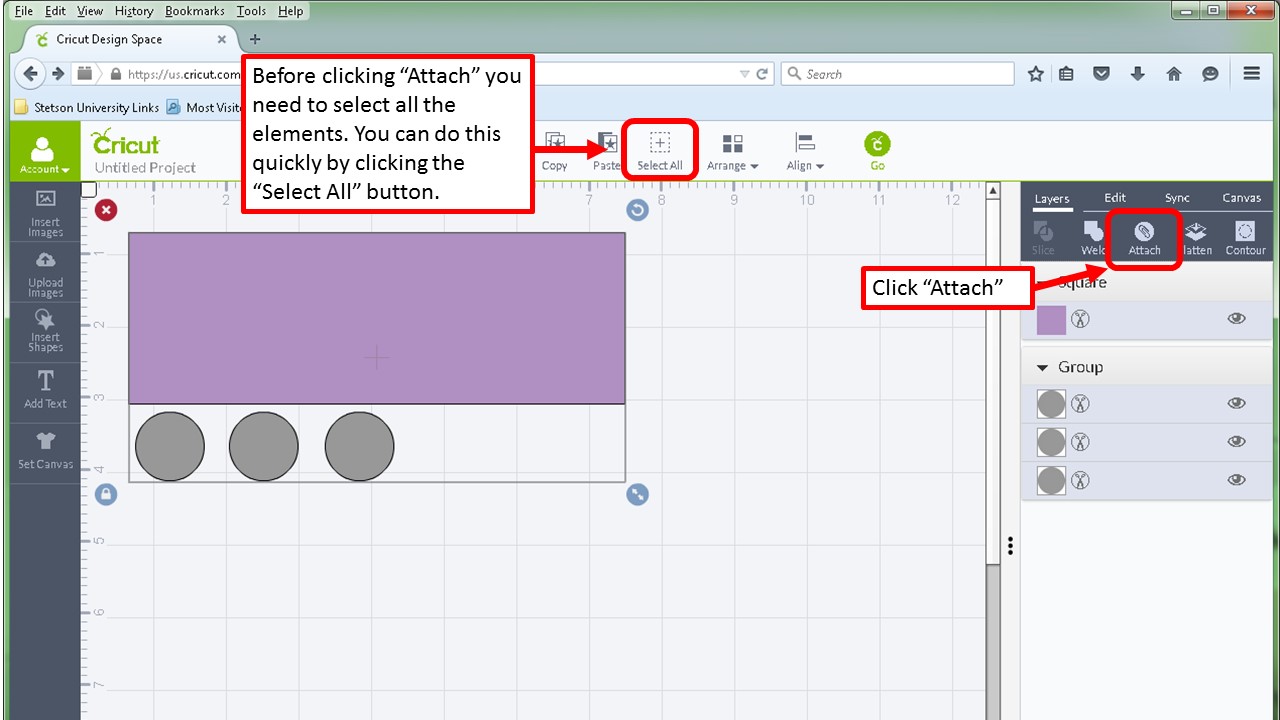
To attach, "Select All" will select all the elements and then you click "Attach".

The items will be grouped together underneath an "Attached Set" container. This is how you know it is attached properly. If you find you missed an element or want to undo then choose the "Undo" button or the "Detach" button.

After clicking the Cricut "Go" button, you will see your attached items placed on the material as you laid them out in the template. change the size in the drop-down field to match the size of the material that you are using.

After choosing the size, you will see the "8.5 X 11" size orients itself to show you your size paper and the position on the adhesive grid. As you can see in the lower right hand corner , the "Sign In To Continue" button appears instead of the "Go" button if you are not currently signed in.

Video Tutorial

Have a question? Ask a librarian! Email libref@stetson.edu. Call or text 386-747-9028.